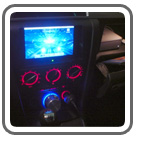
 Matt Burriola installed a Mac mini into his 2005 Mazda 3 sedan and documented the entire installation process. His goal for his project was to create a system with better than stock sound and capability, while maintaining a clean, stock appearance.
Despite not using an Apple since high school, Matt was inspired while doing other mods to the car (adding window tint and an alarm), and decided to go for it.
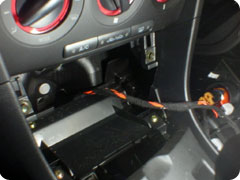
First, Matt took apart his cupholder assembly, cigarette lighter panel, and the center console. Once in there, he thought that the Mac mini was too big too fit in there without a bunch of hacks, and decided on a glove box install instead.
 |
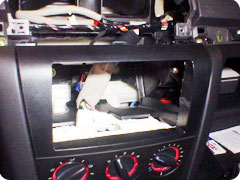 |
Next, he removed the stock radio and was left with a vast space, which is where he installed a 7″ Xenarc 700TSV touch screen. It also provided ample space behind the screen to stash the CarNetix P1900 power supply.
Matt highly recommends a wiring harness if you plan to completely remove your stock head unit from your Mazda 3. He used a Metra 70-7903 harness to make speaker connections on the pigtails. That way if you ever need to go back and use the stock radio, you just unplug this harness and replace your old stereo. He used the power feed from the Metra harness to feed the valet switch, which controls the sleep mode of the CarNetix P1900.
He used a 3-position switch to provide greater control over the sleep state of the CarNetix P1900 and Mac mini. As installed, if the switch is in the middle position, then the center wire stays at 0 volts and tells the P1900 to sleep the Mac. In the downwards position, the car’s ignition state will control the Mac’s sleep state. In the upwards position, the P1900 is getting constant 12v on the ignition wire (regardless of actual ignition state) so you can run the computer even with the car off. Matt does this when he wants to sync his iTunes over the wireless network.
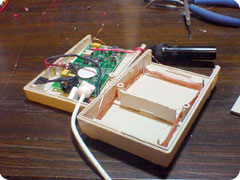
Since he completely removed the stock head unit, he needed a way to get radio back into the system. Using a Griffin Radio Shark, he re-cased the guts into a small project box, de-soldered the original copper FM antenna wire, and soldered a short wire to the positive contact on a Motorola socket. Now the stock radio antenna can plug right in, it provides greatly improved FM reception.
 |
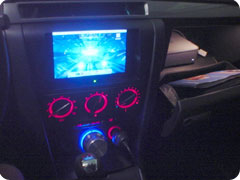 |
A Griffin PowerMate controls volume for the entire system and casts a cool-looking blue glow that contrasts nicely with the red glow of the stock Mazda 3 controls.
Specs
- Auto: 2005 Mazda 3 sedan
- Mac mini configuration: 1.25 GHz, 40GB hard drive, 512MB SDRAM, AirPort Extreme and Bluetooth
- Display: 7″ Xenarc 700TSV touch screen monitor
- Input devices: Apple Wireless Keyboard
, Apple Wireless Mouse
, Griffin PowerMate USB Controller
- Other peripherals: Belkin 4 port USB 2.0 powered hub, Griffin Radio Shark radio module (modified), USGlobalSat BU-353 USB GPS Receiver
- Powering: CarNetix CNX-P1900 power supply with CNX-P5V 15 Watt +5V Regulator
- Audio: No stereo head unit, Kicker KX-200.4 4 channel amplifier, installed under driver’s seat, Kicker KX-250.2 2 channel amplifier, on back of rear seat in trunk, Kicker Solo Baric 10″ L5 Subwoofer, dual 2-ohm voice coils wired in series, Kicker single 10″ vented enclosure
- Installation Accessories: Metra radio install kit for Mazda 3 (99-7504) – modified for use as screen bezel, Metra radio wiring harness (70-7903)
- Software: TatraApp, iTunes, RoadNav
If anyone is looking to install a Mac mini in their Mazda 3, head on over to Matt’s site to see more pictures and learn exactly how to do it. Nice job Matt!


